This is an exciting project for the students. Trace a circle shape on a piece of paper. The template included here will make a completed circle about eighteen inches in diameter. To make a smaller circle, trace a circle on a sheet of paper and cut it out. Then fold it in half, in fourths and then in eighths. To give the finished circle a scalloped edge, make a deeper cut on the corners of the pie shape. One eighth (pie shape) will be the pattern for this project. Begin by giving each student one eighth of a circle for them to design.
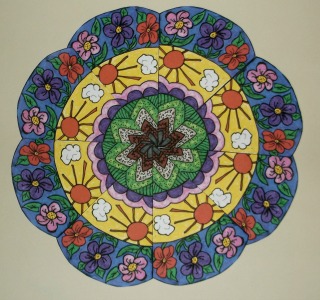
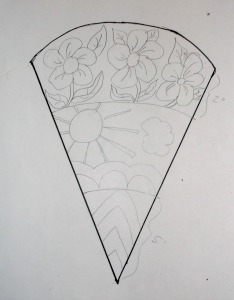
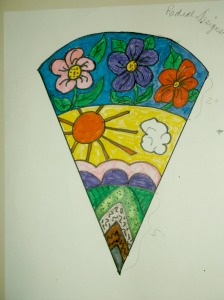
Suggest that they make a small mark at equal distances from the top of the arc down a distance, and from the tip of the shape up, drawing a straight, curved or wavy line between the two opposite marks. In the example you’ll notice that the top section is filled with flowers, the middle section is an outdoor scene, and the bottom to the tip is mountainous. Give the students some ideas of what should be in each section, or let them improvise.
When one pie shape has been completed, print off seven copies, cut and tape them together, to complete the circle.
Options: After the design has been drawn with a pencil, copy off seven additional copies, before coloring them. Remind the kids to use the same colors on each of the copies.
Or: After the design has been drawn with a pencil, have the student trace the design seven additional times. This works well, if using typing paper for the circle.
Supplies:
• 9†Pie shape (Template)
• Ruler
• Pencil
• Colored marker, colored pencils or crayons
• Black Sharpie
• Scissors
• Tape
• Printer
Directions:
1. On your pie shape, make a small mark at equal distances from the top of the arc down a distance, and from the tip of the shape up, drawing a straight, curved or wavy line between the two opposite marks.
2. With a pencil, draw designs on the pie shape.
3. Using colored markers, colored pencils or crayons, color your design. Use the black Sharpie to trace over all your pencil lines.
4. Print seven copies of your completed colored pie shape.
5. Carefully cut the pie shapes, lay them face down on a flat surface, match two pie shapes side to side, with the tips even and the sides overlapping slightly, and tape. Repeat with all the pie shapes to form a circle.
5th Grade Projects Gallery: