![]()
![]()
![]()
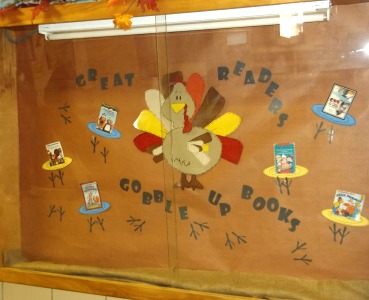 If you are looking for an idea for a Thanksgiving bulletin board, this is one that we just finished for the library. This is really appropriate for any classroom bulletin board.  Patterns for making the turkey are included in this project. I cut the turkey pieces out of cereal box cardboard, but you could use poster board or card stock.Â
For the letters that we used, choose the Showcard Gothic  font at 300 height size. Go to Google images to find clip art for the turkey feet. Make plenty of them because they really do look cute on the bulletin board.Â
We chose cover images of books that we had in the library and printed them at between 300 to 500 height sizes. The book cover images that we used, and a page of plates is included here also.
Supplies:
- Cereal box cardboard, card stock or poster board
- Craft paints and paint brushes
- Black Sharpie
- Tape
- Turkey body (Pattern)
- Turkey head, feet (Pattern)
- Turkey beak, waddle, comb, and back side wing feathers (Pattern)
- Turkey front wing feathers (Pattern)
- Turkey tail feathers (Pattern 1)
- Turkey tail feathers (Pattern 2)
- Plates (Pattern)
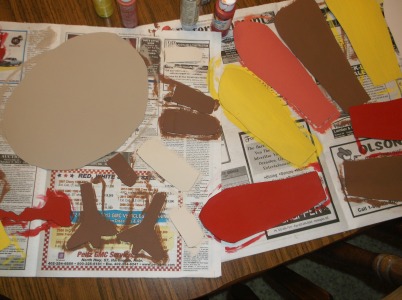 Cut the turkey pattern pieces from cereal box cardboard or use card stock.
Paint the pieces in your chosen colors or reference the photo at left.
Draw in eyes, eyebrows and body feathers with black Sharpie marker. I also drew stitch marks around the pieces.
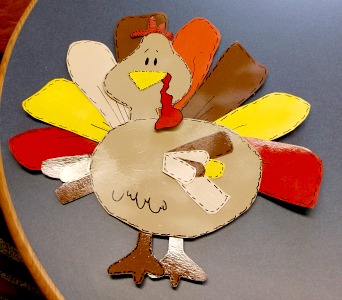 Arrange the pieces. I glued and taped the tail feathers together. Glued the head onto the body, glued the bead/waddle and comb onto the head. Then I glued the back wing feathers together and to the back of the left side of the body, glued the front wing feathers to the body and the feet together where they overlap and then to the bottom of the body.
After the glue was dry, I taped everything down on the rear side of the turkey, to hold everything sturdy. After everything was dry, I gave the turkey a coating of clear glaze or sealer so the turkey can be used again next year. I don’t know if it would work to laminate this finished turkey or not, that’s why I chose to seal it.
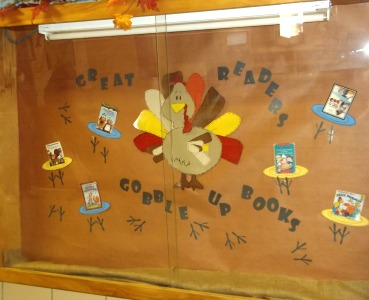 Choose a color for the background of your bulletin board.
Glue books to plates.
Arrange your bulletin board.
Miscellaneous Projects Gallery:


