
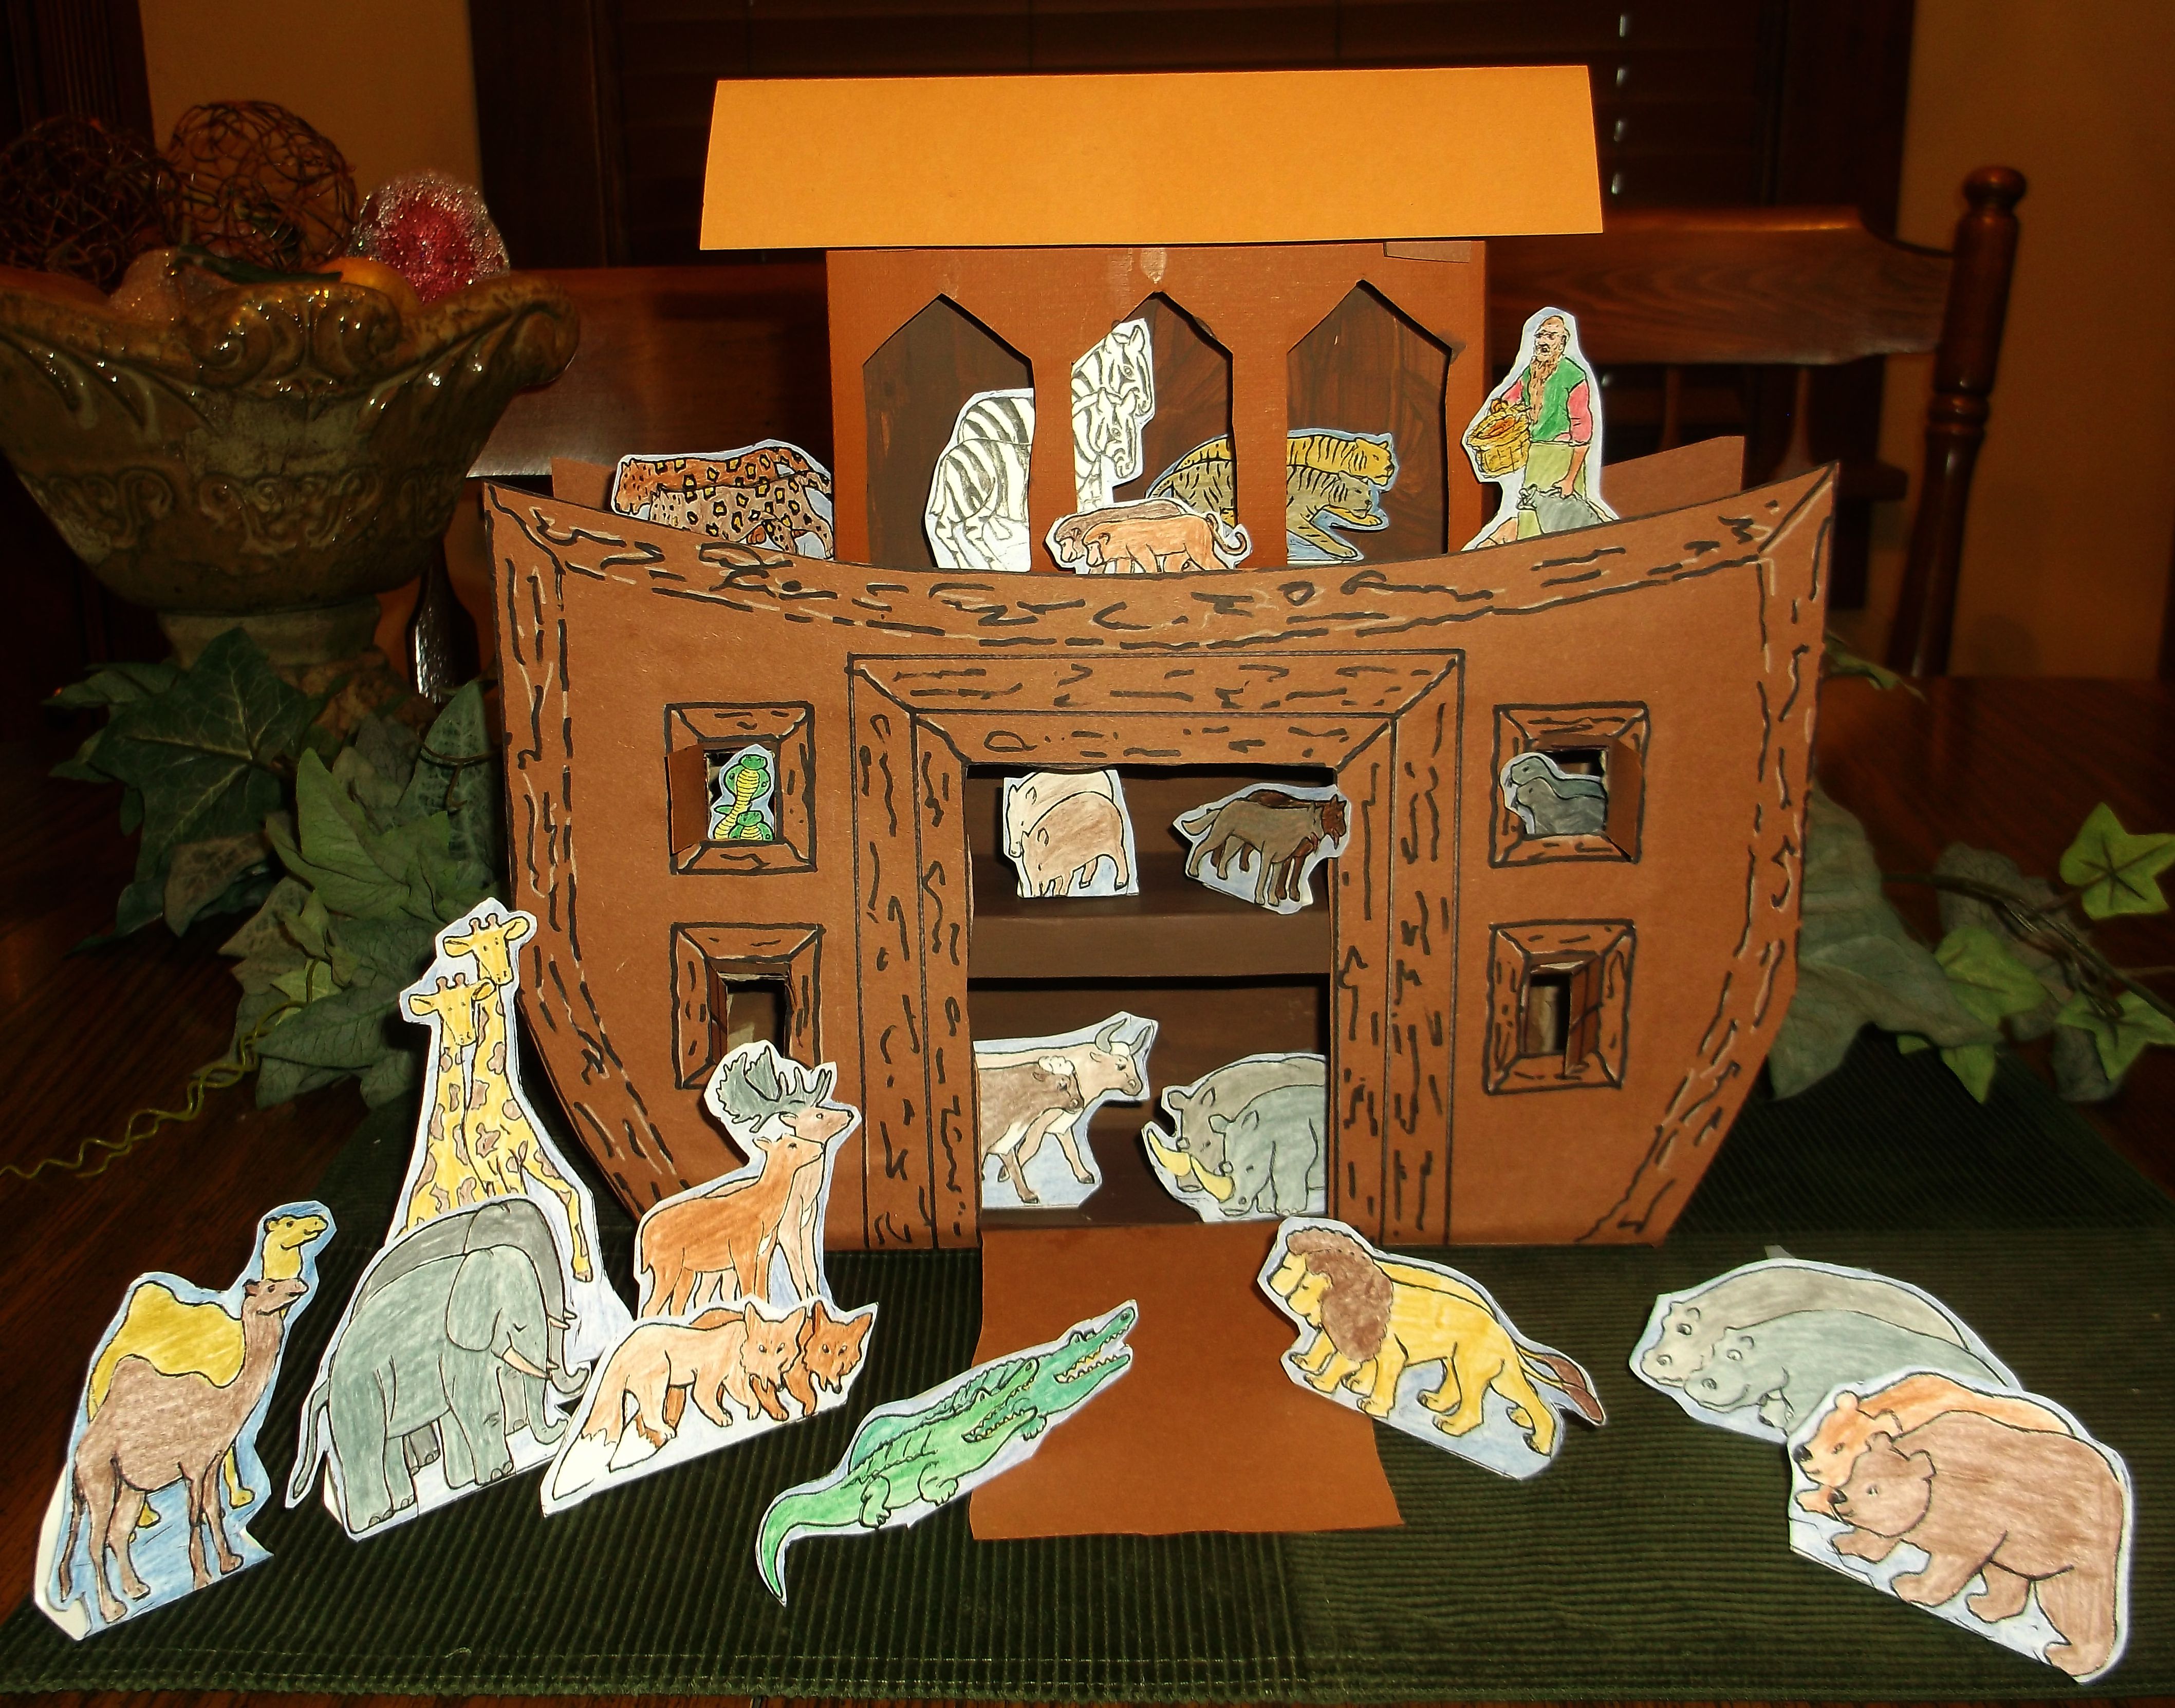
 One of the favorite Bible stories for kids is the story of Noah and the ark. They can easily imagine Noah building a huge ark and then gathering together pairs of animals to save them from the big flood that God has promised. So, of course, the kids enjoy Noah’s ark art projects.
We use a large Cheerios box to build our ark, and animal pairs printed on card stock. We’ve included templates for how to cut the Cheerios box, and how to make the ark’s second story and roof. Printable animals to color, and a colored version, are also included.
Supplies:
- Large 21 oz. size Cheerios box
- 12″ X 18″ Construction paper: brown or/and tan
- White card stock for animal prints
- Glue, scissors, stylus or old ball point pen, craft knife, black Sharpie
- Colored pencils or crayons, brown paint, paint brush
- Ark Covering Pattern in four pieces: (Piece 1); (Piece 2); (Piece 3); (Piece 4)
- Second story of ark (Template)
- Colored Animals: (colored animal template 1) ( colored animal template 2) (colored animal template 3)
- Black and White animals: (black and white animal template 1) (black and white animal template 2) (black and white animal template 3)
Directions:
Click on the picture to get a larger view:

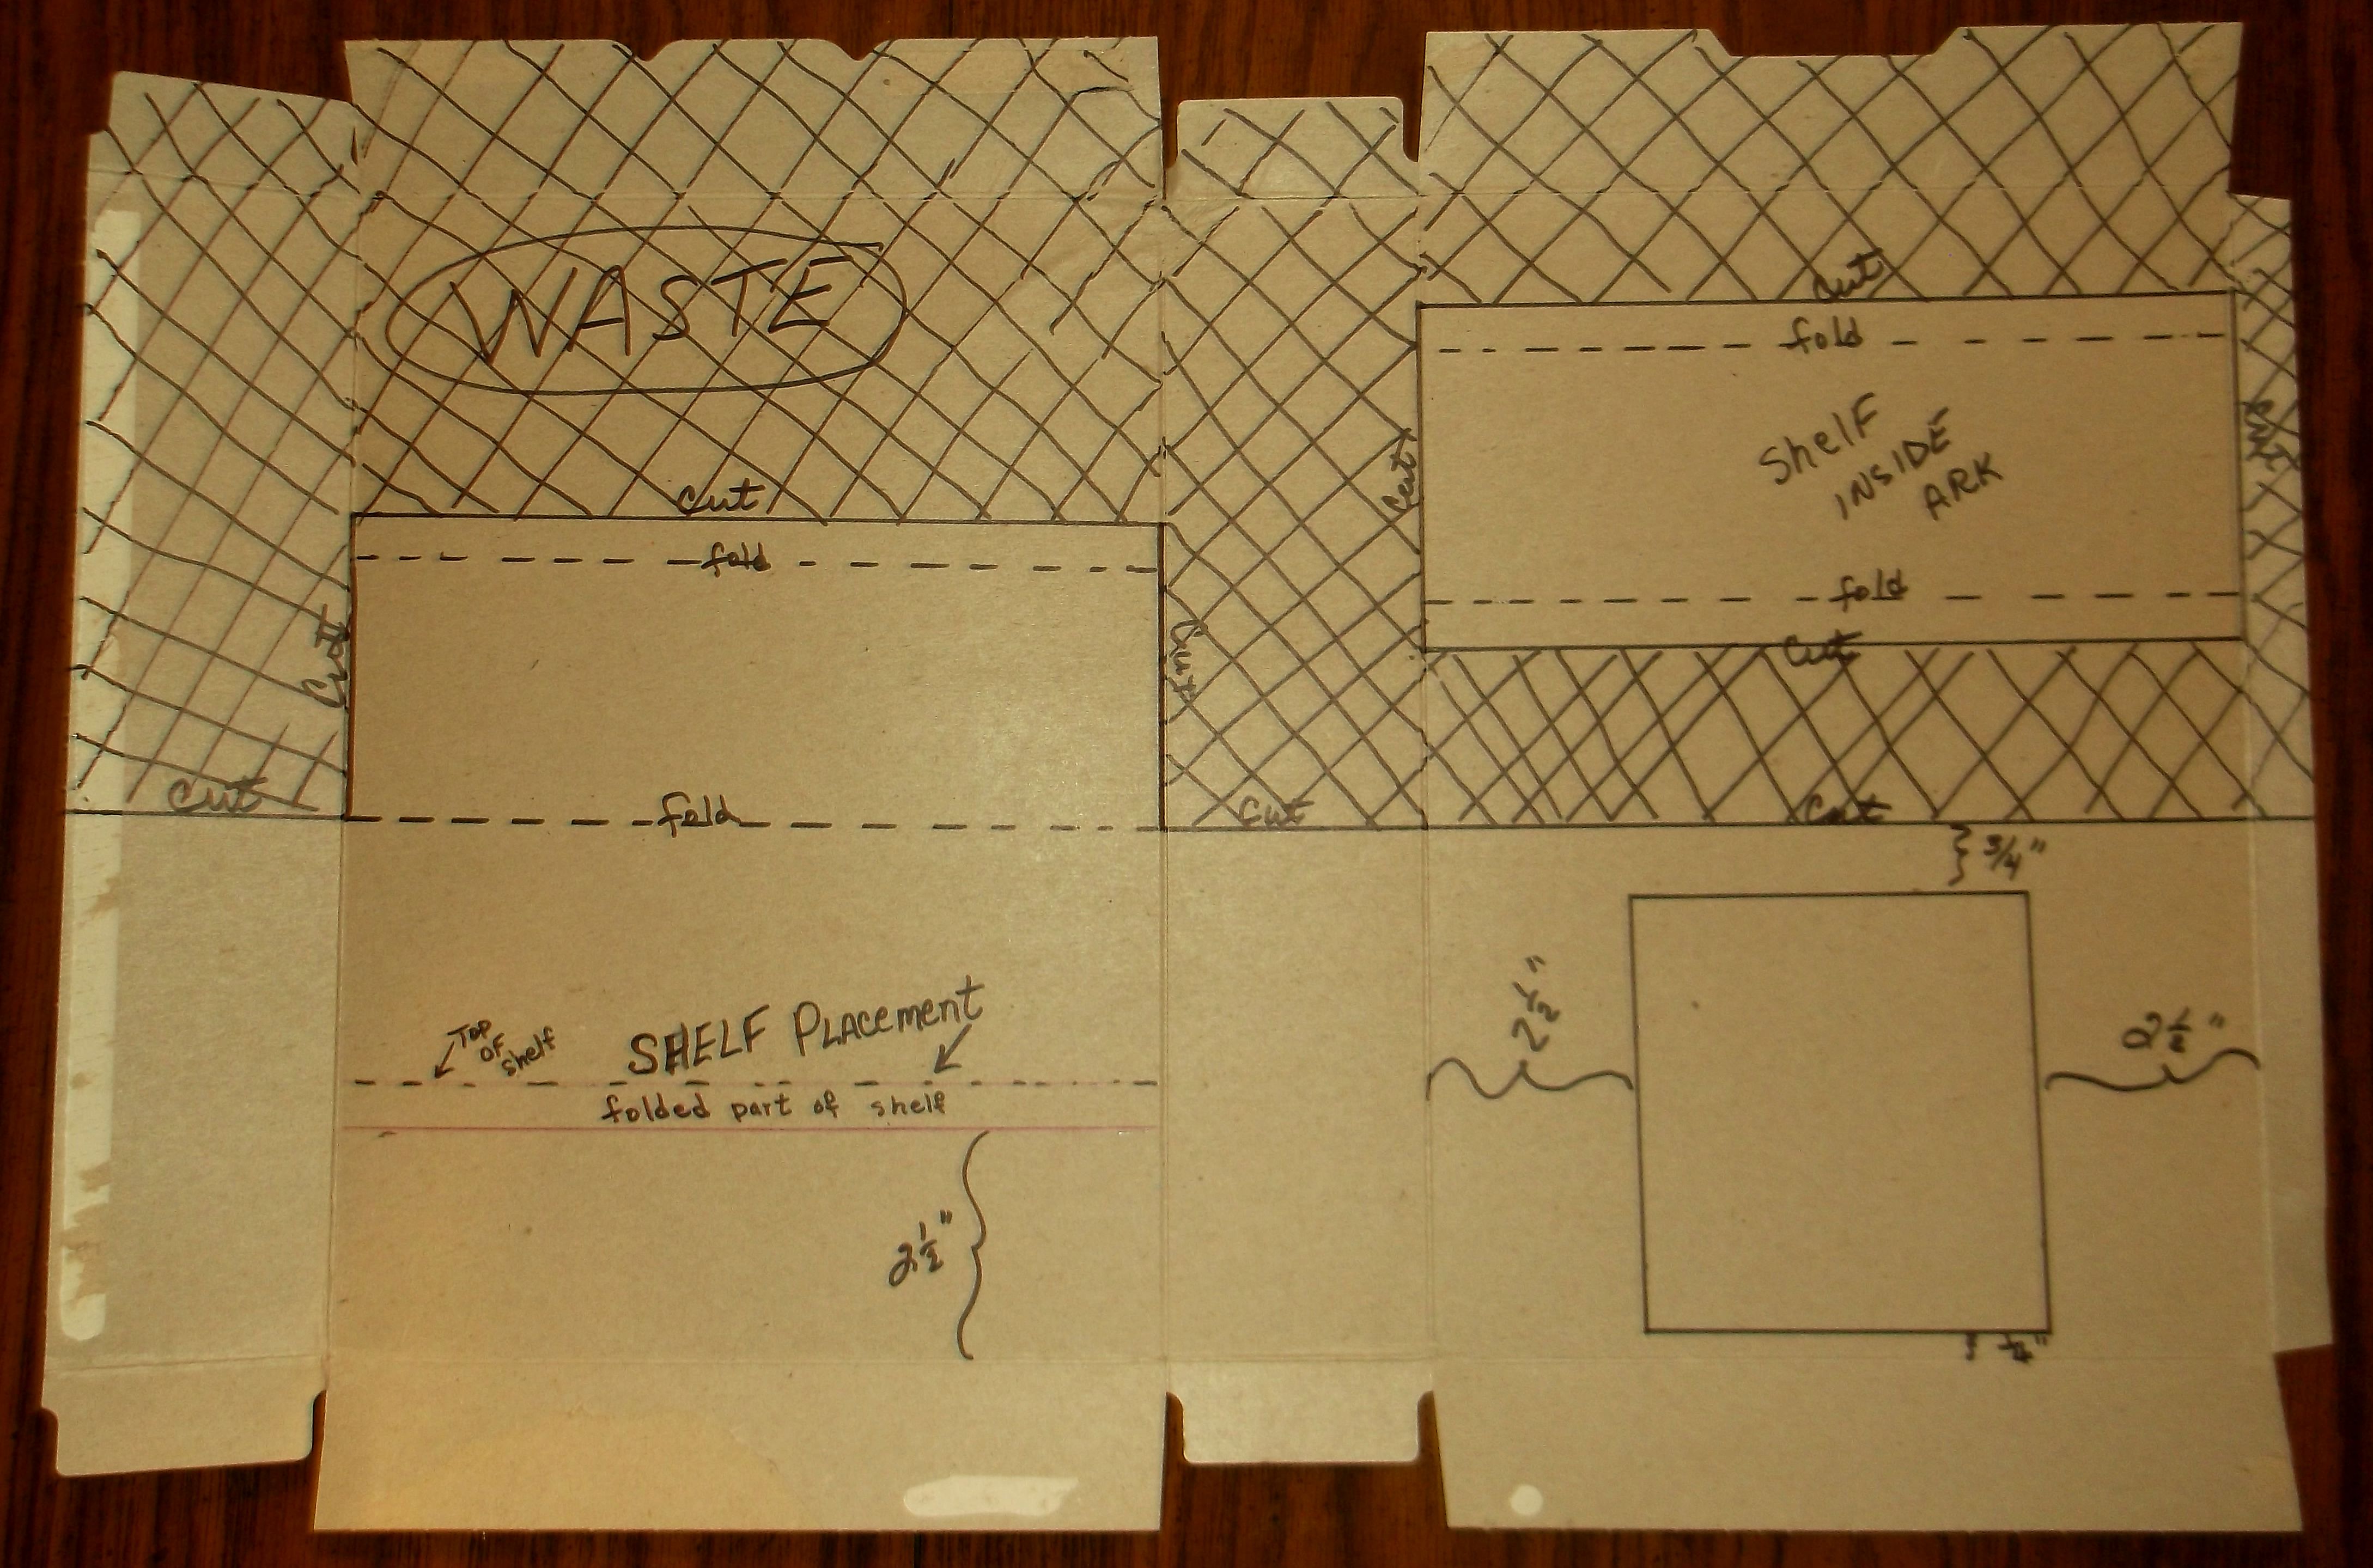
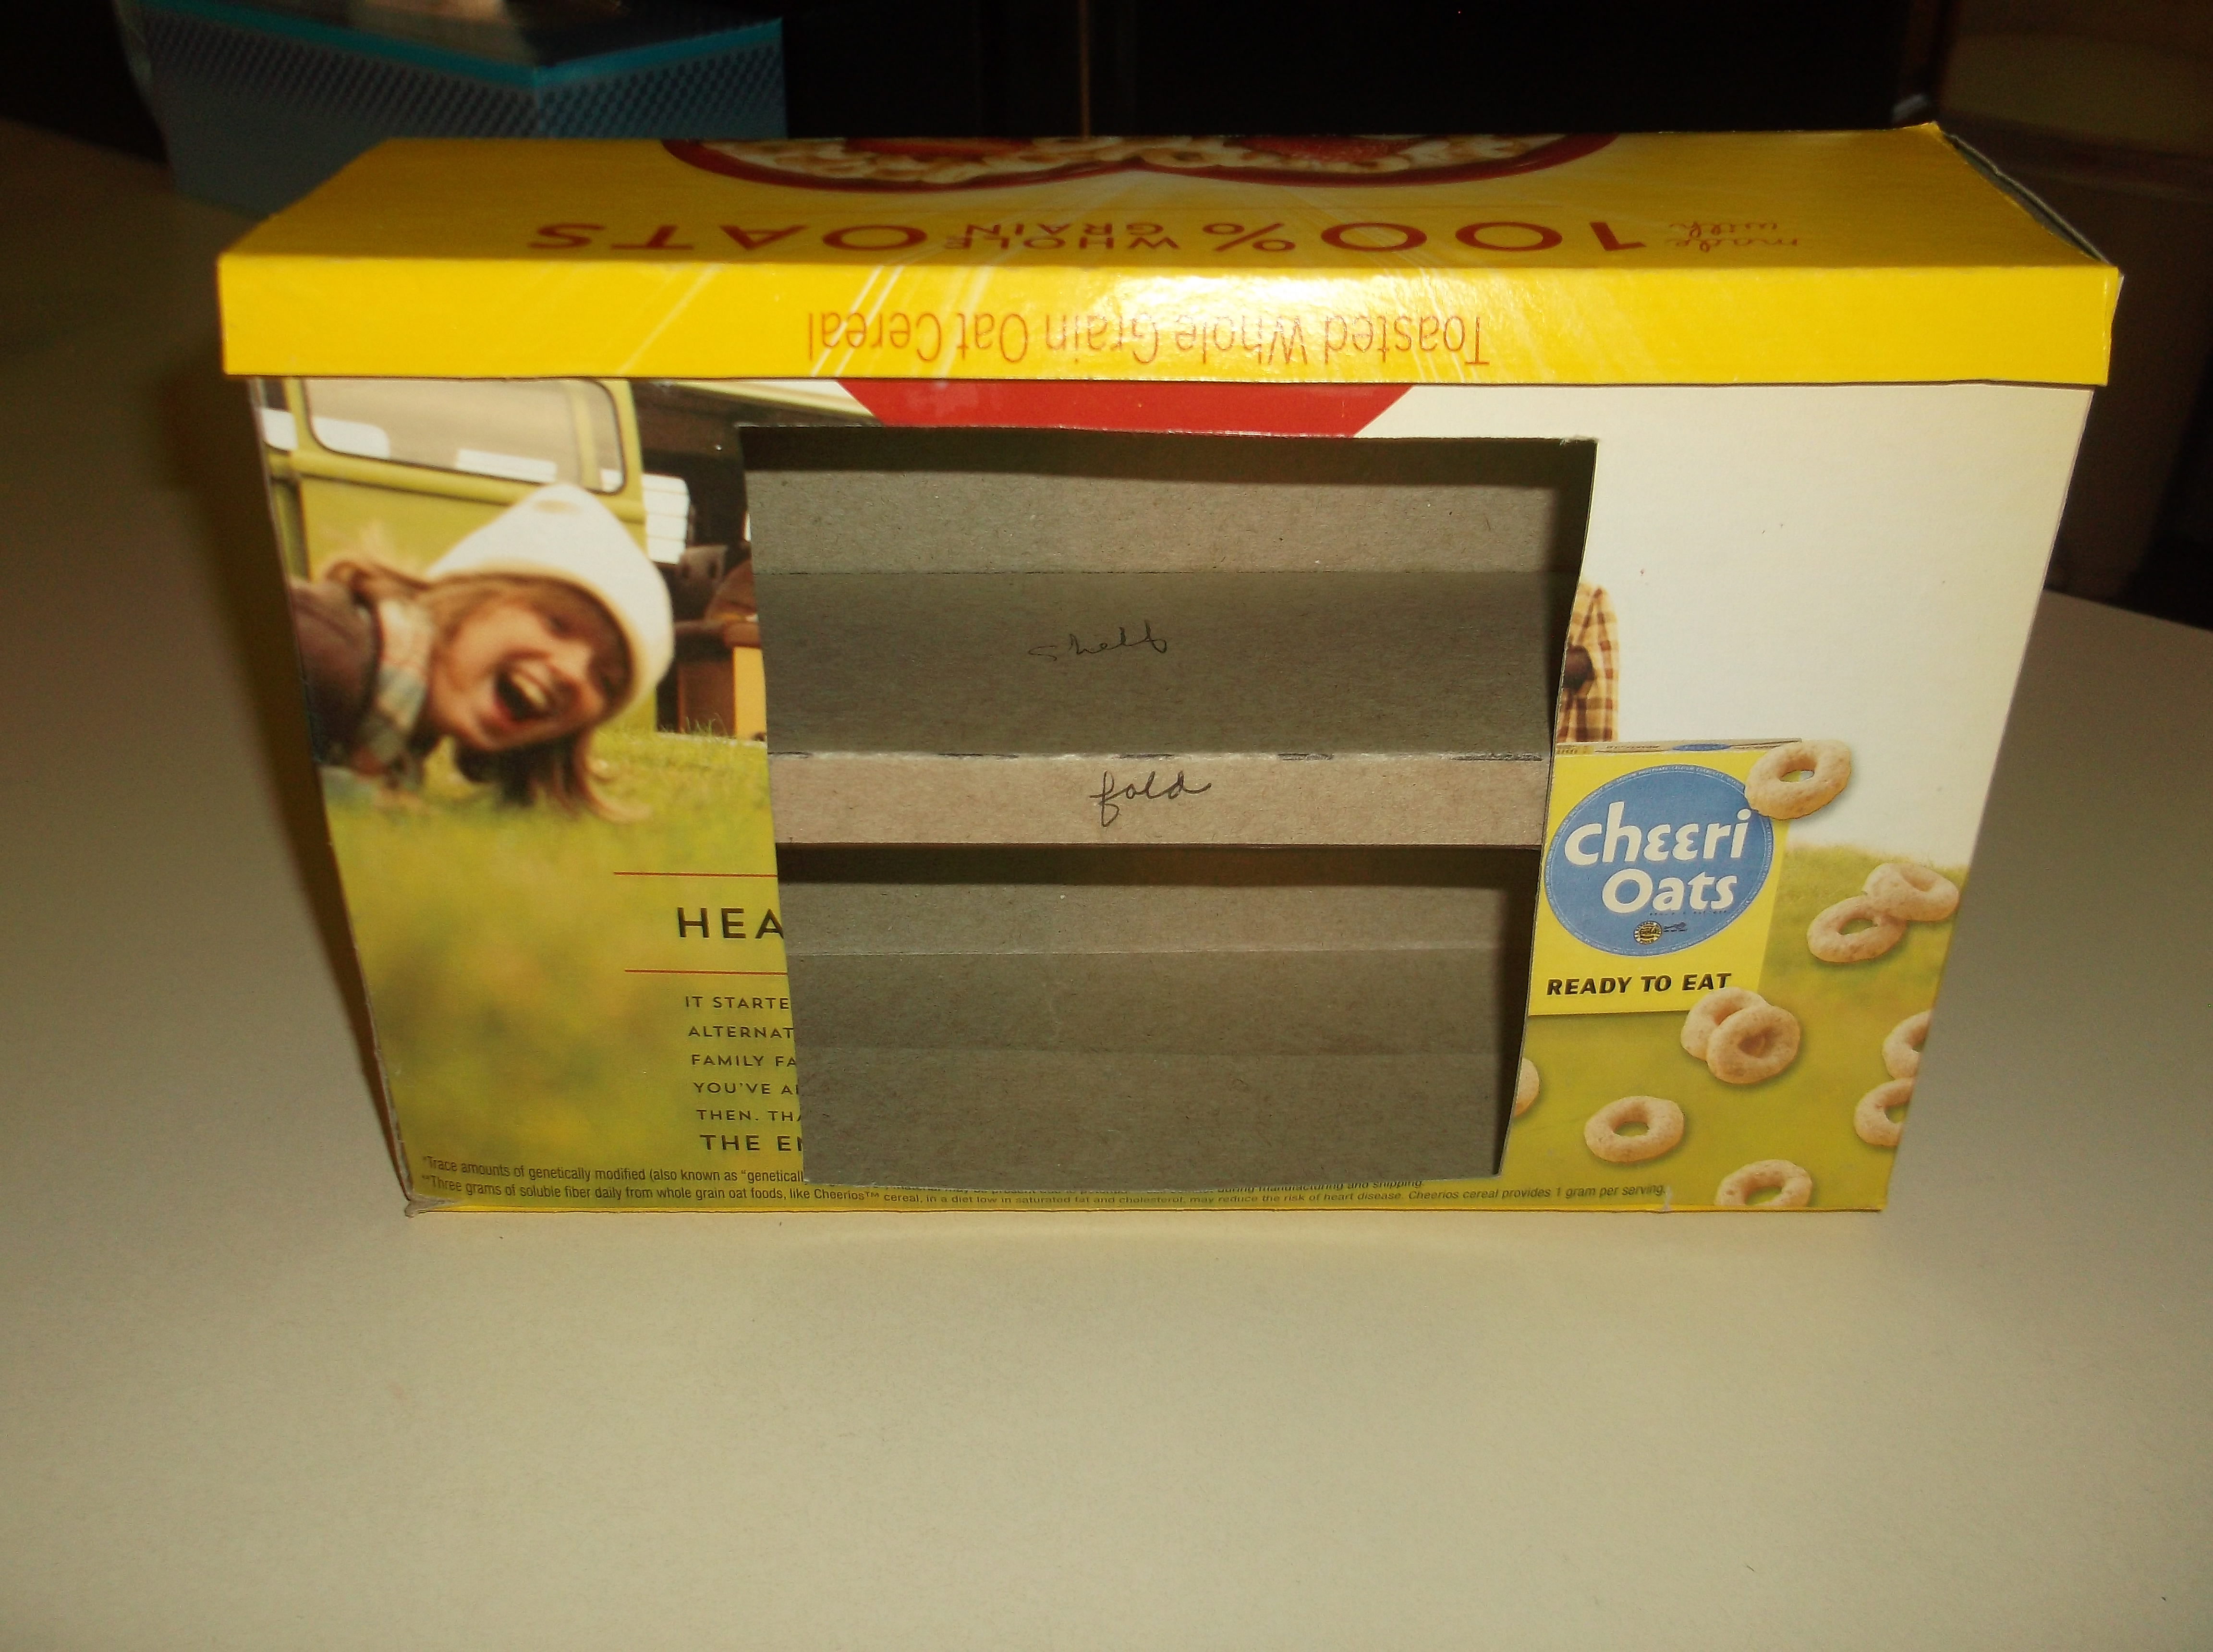
1. Carefully open the bottom and side flaps of the Cheerios box and lay it flat.
2. Use the measurements shown on the picture for draw the ark on the Cheerios box. Notice that the bottom flaps of the Cheerios box are left intact to be refolded to form the bottom of the ark.

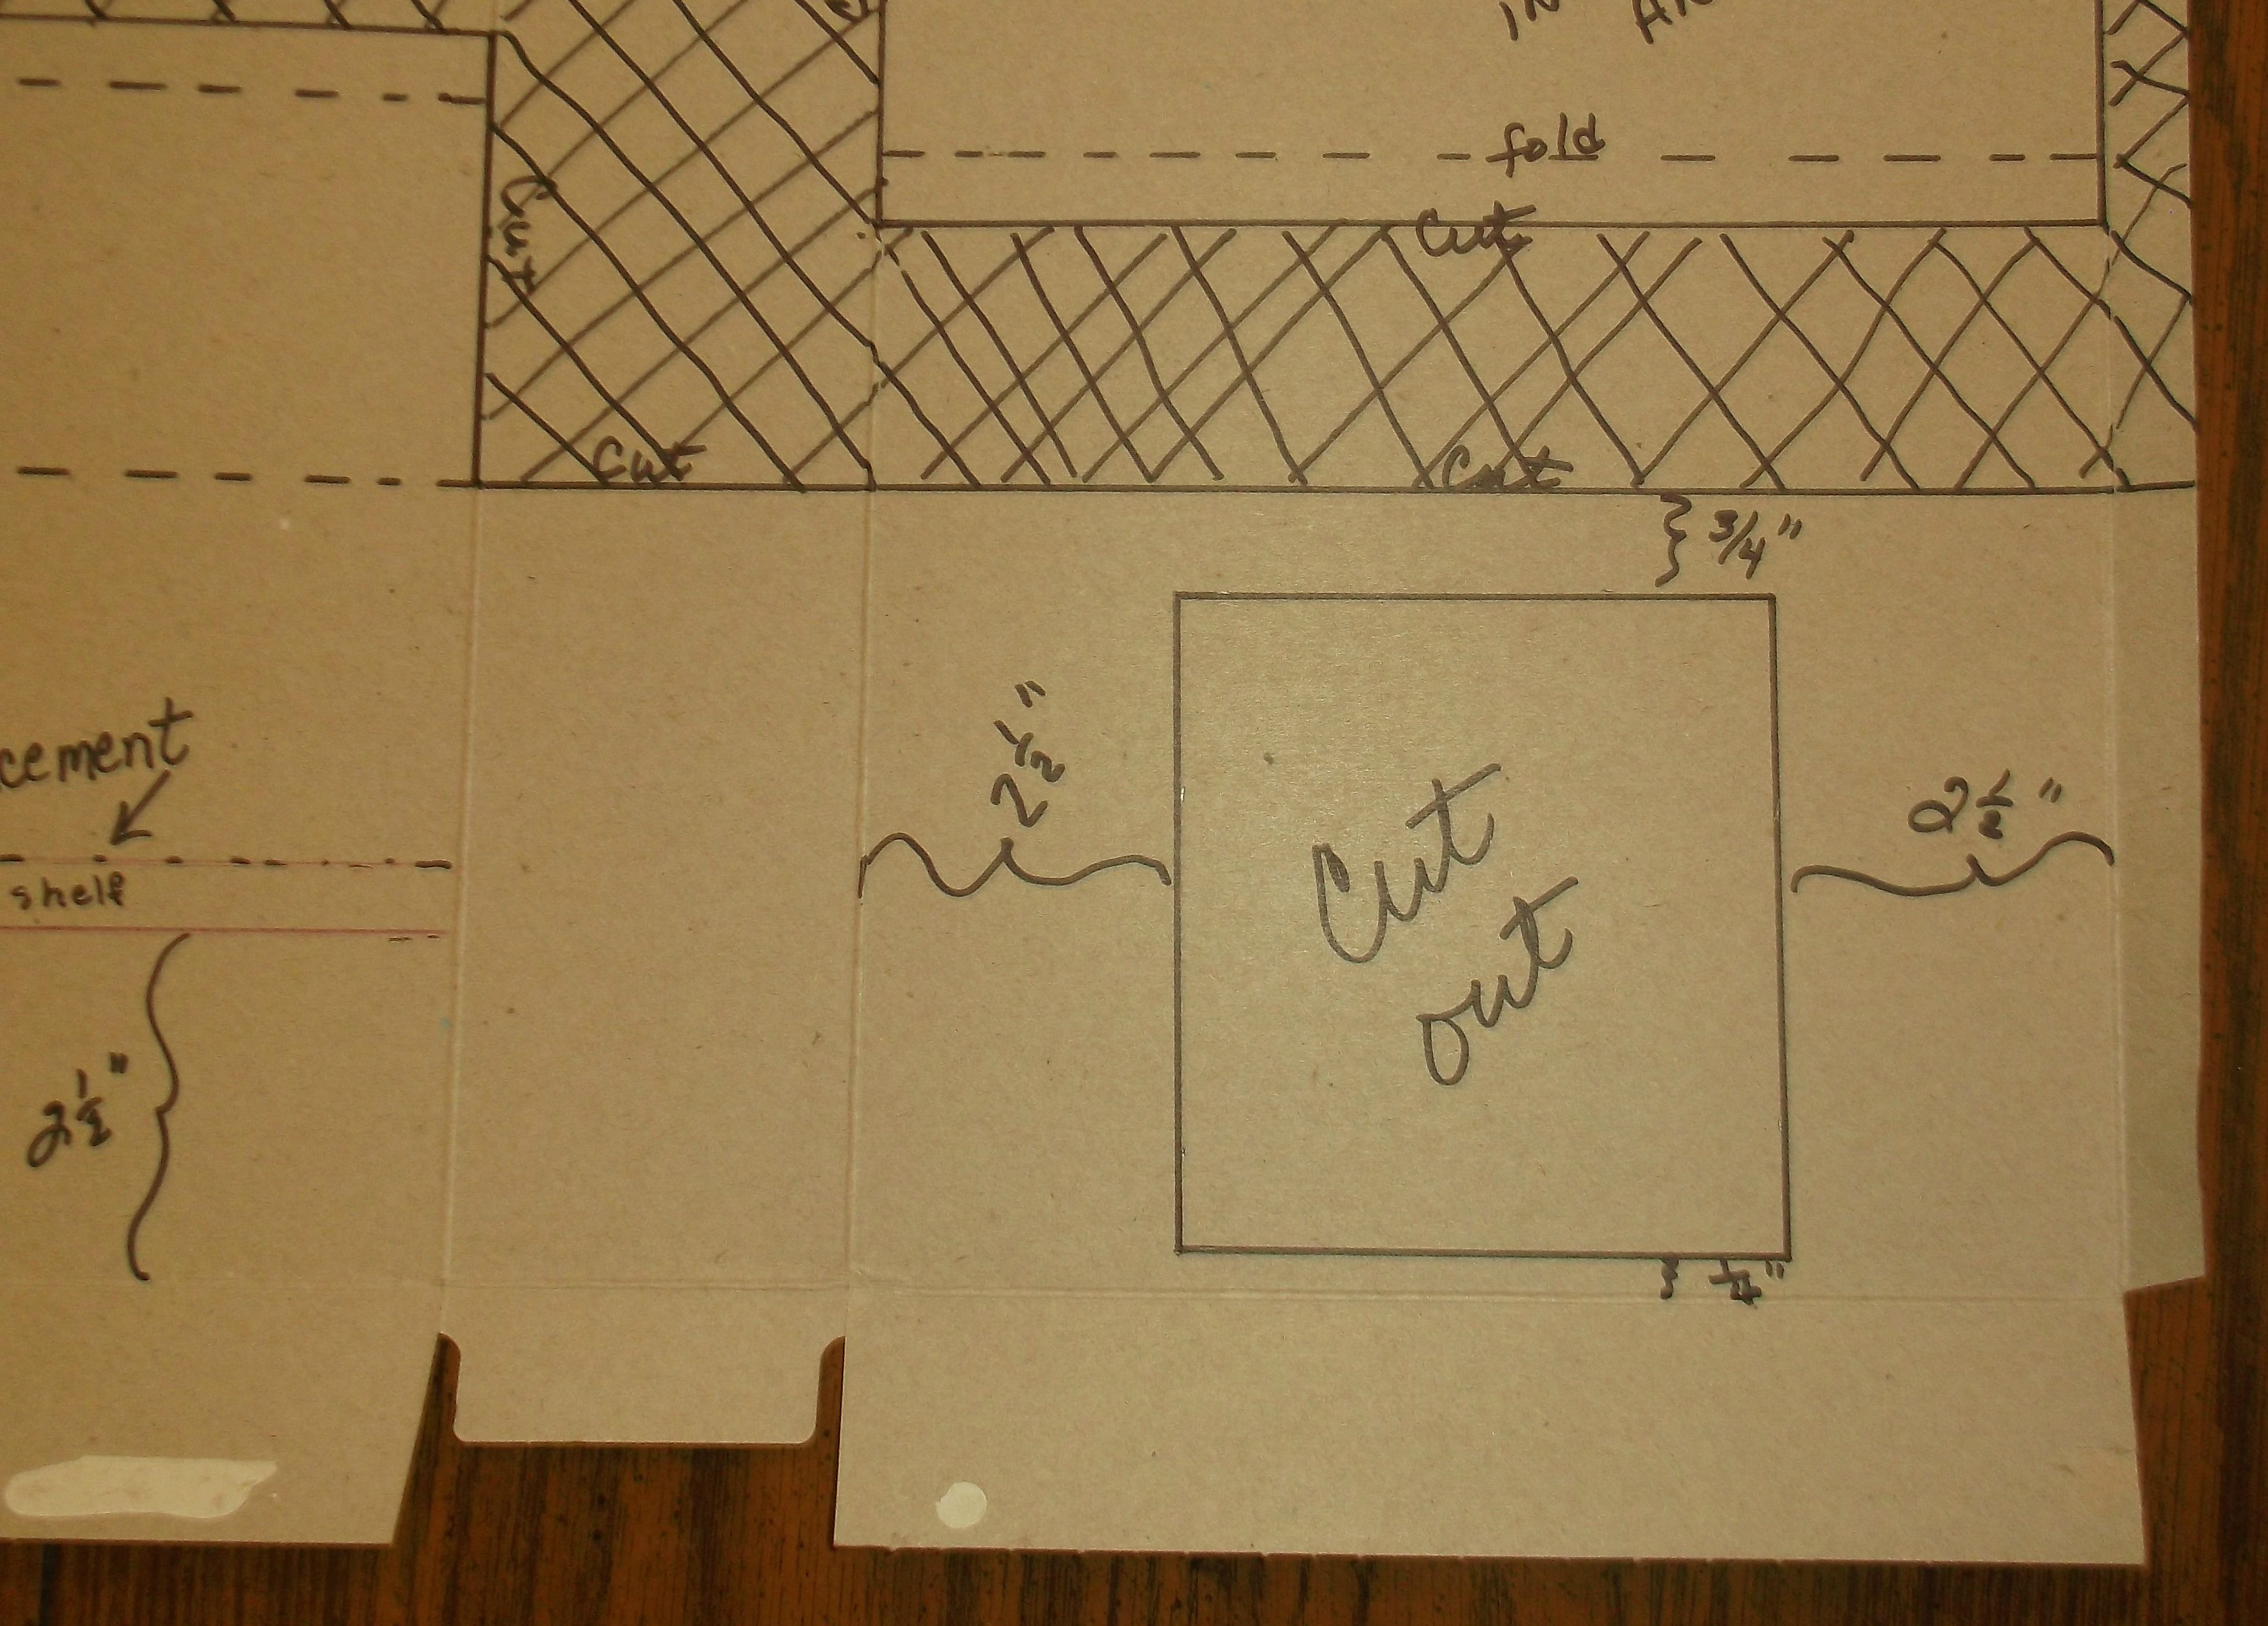
3. Cut along the CUT lines drawn, and use a stylus on all the dotted lines, for ease at folding.
4. Cut the shelf from the box, stylus and fold the two long edges. 
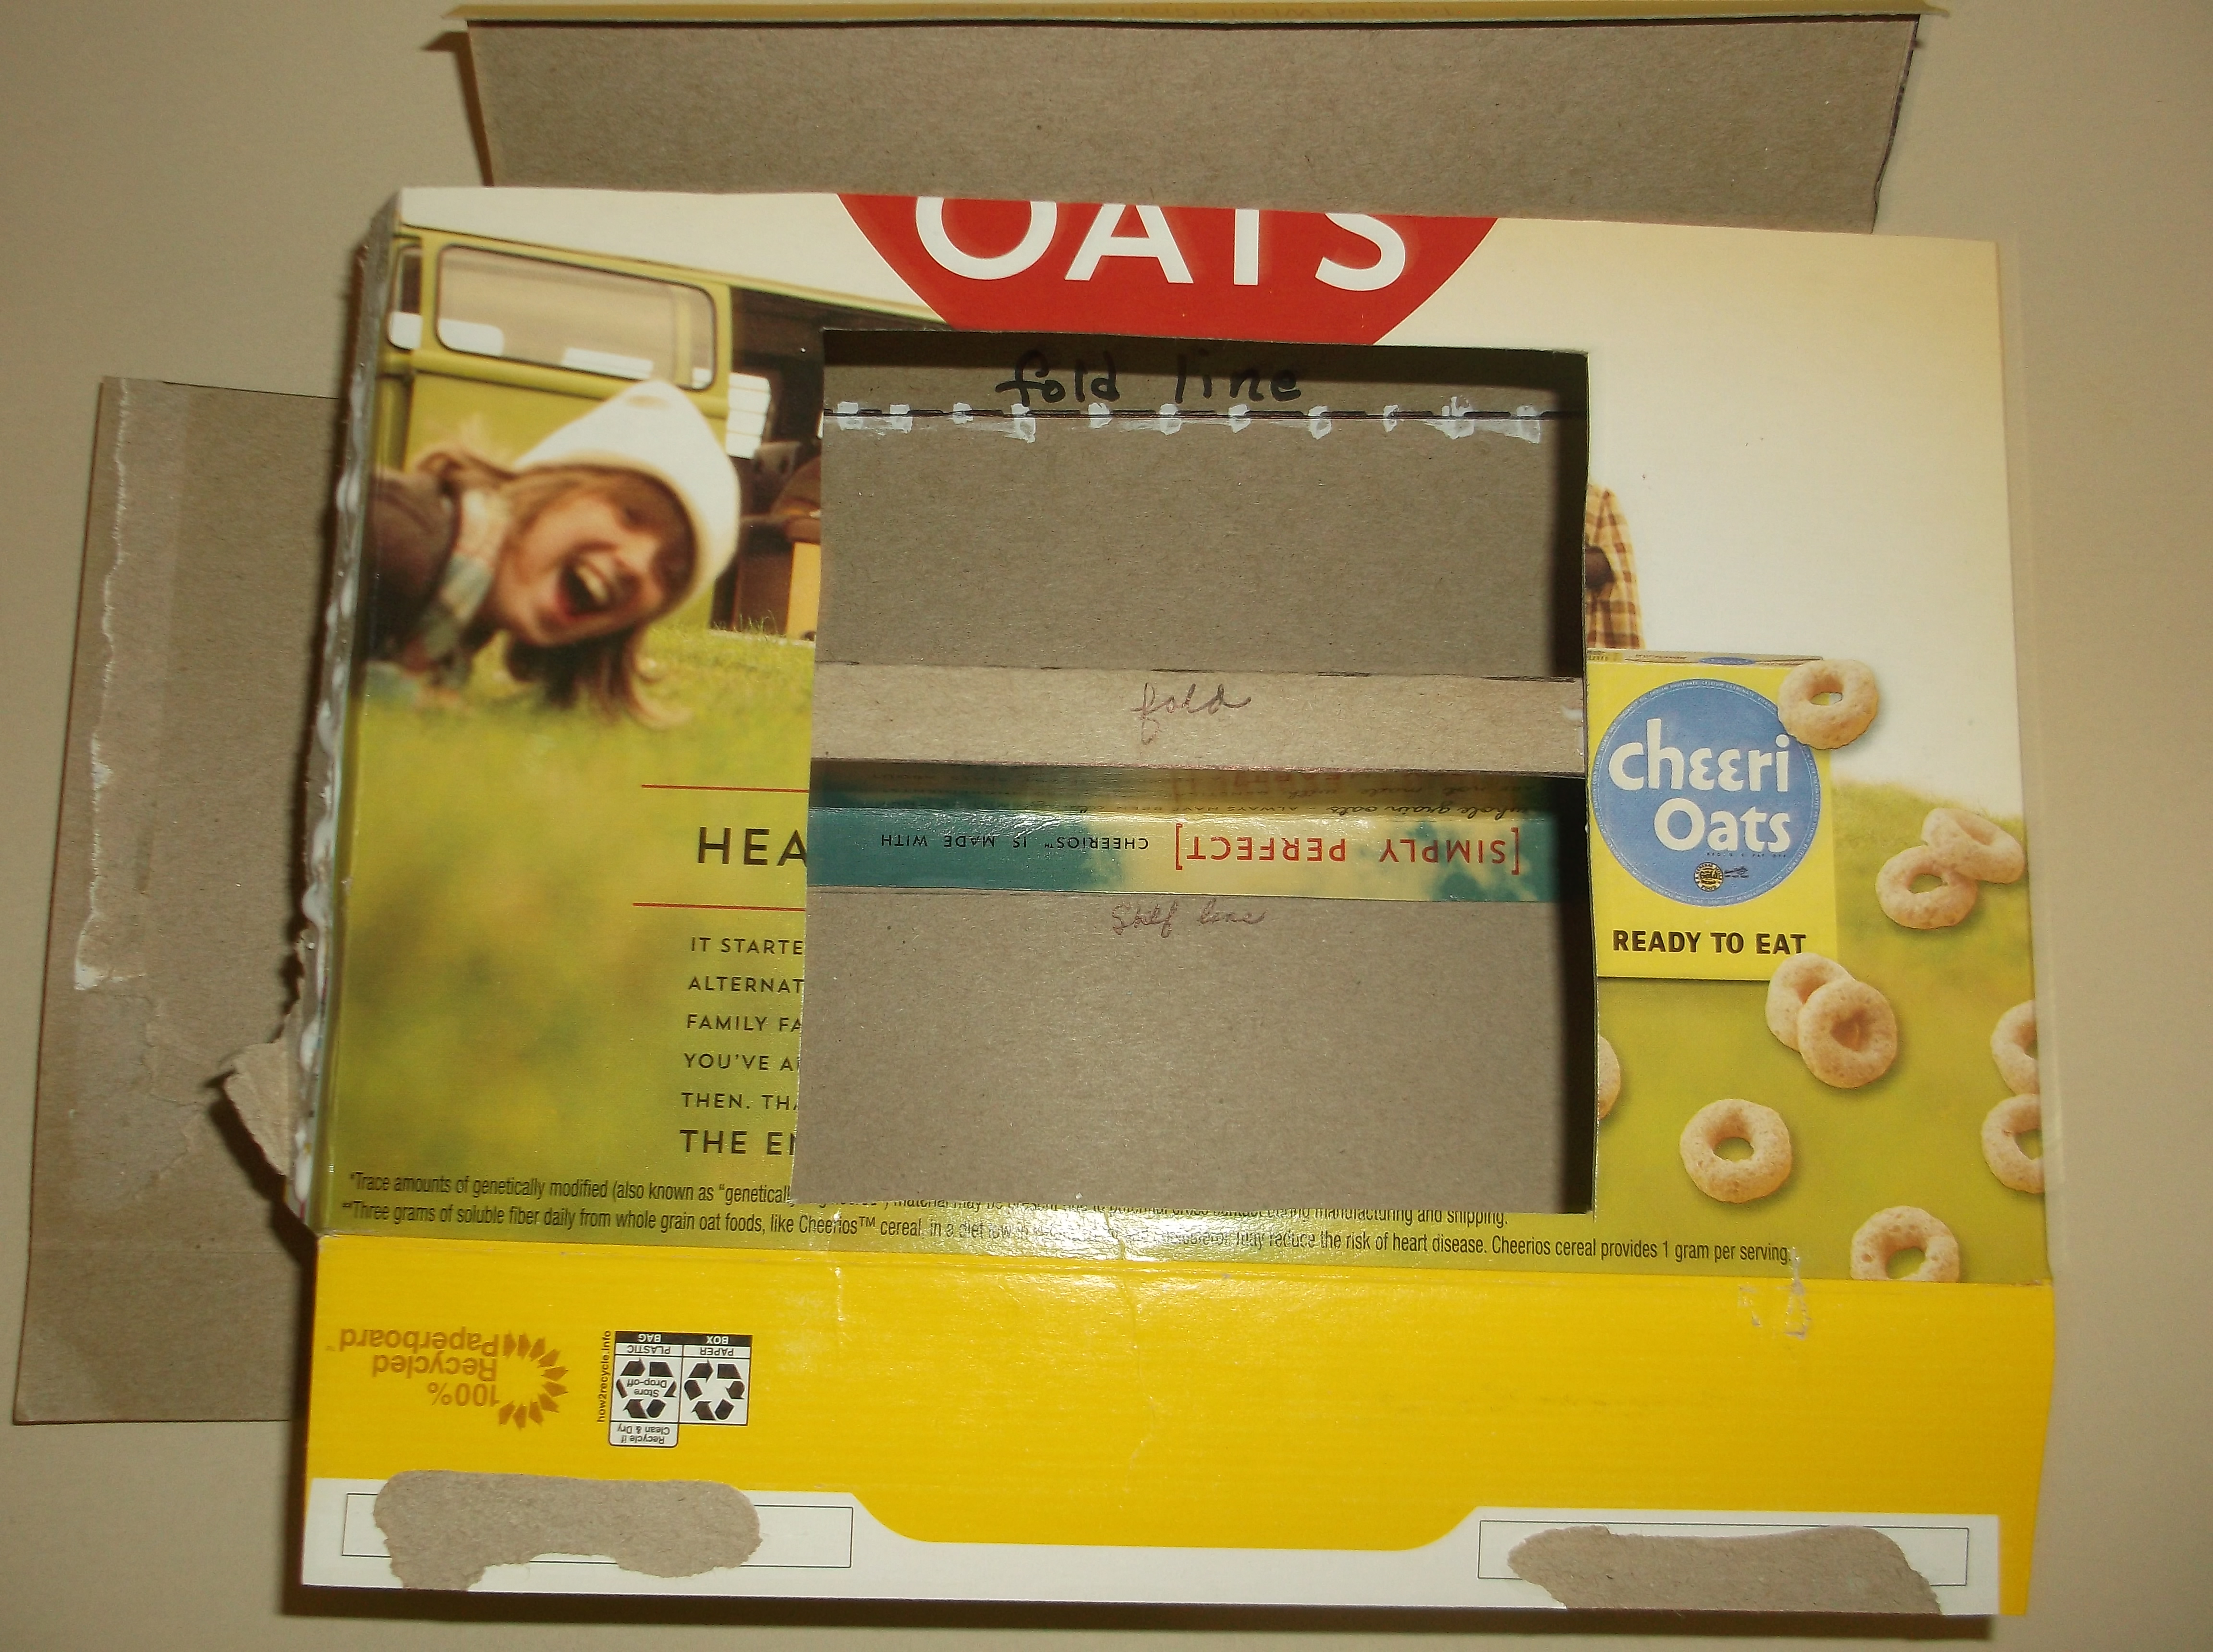
5. Apply glue on one edge of the shelf piece and matching the bottom edge of the shelf to the line drawn on the ark, glue the shelf to the appropriate line drawn on the box. Apply glue to the other side of the shelf piece, and to the side seam of the box, and the bottom flaps of the box. Re-form the box, and form a floor with the shelf.

Fold down the top of the box and glue in place. Paint box top and sides, or all of it if you wish.
6. Now you have the main ark part made, to be covered with the construction paper ark covering later.
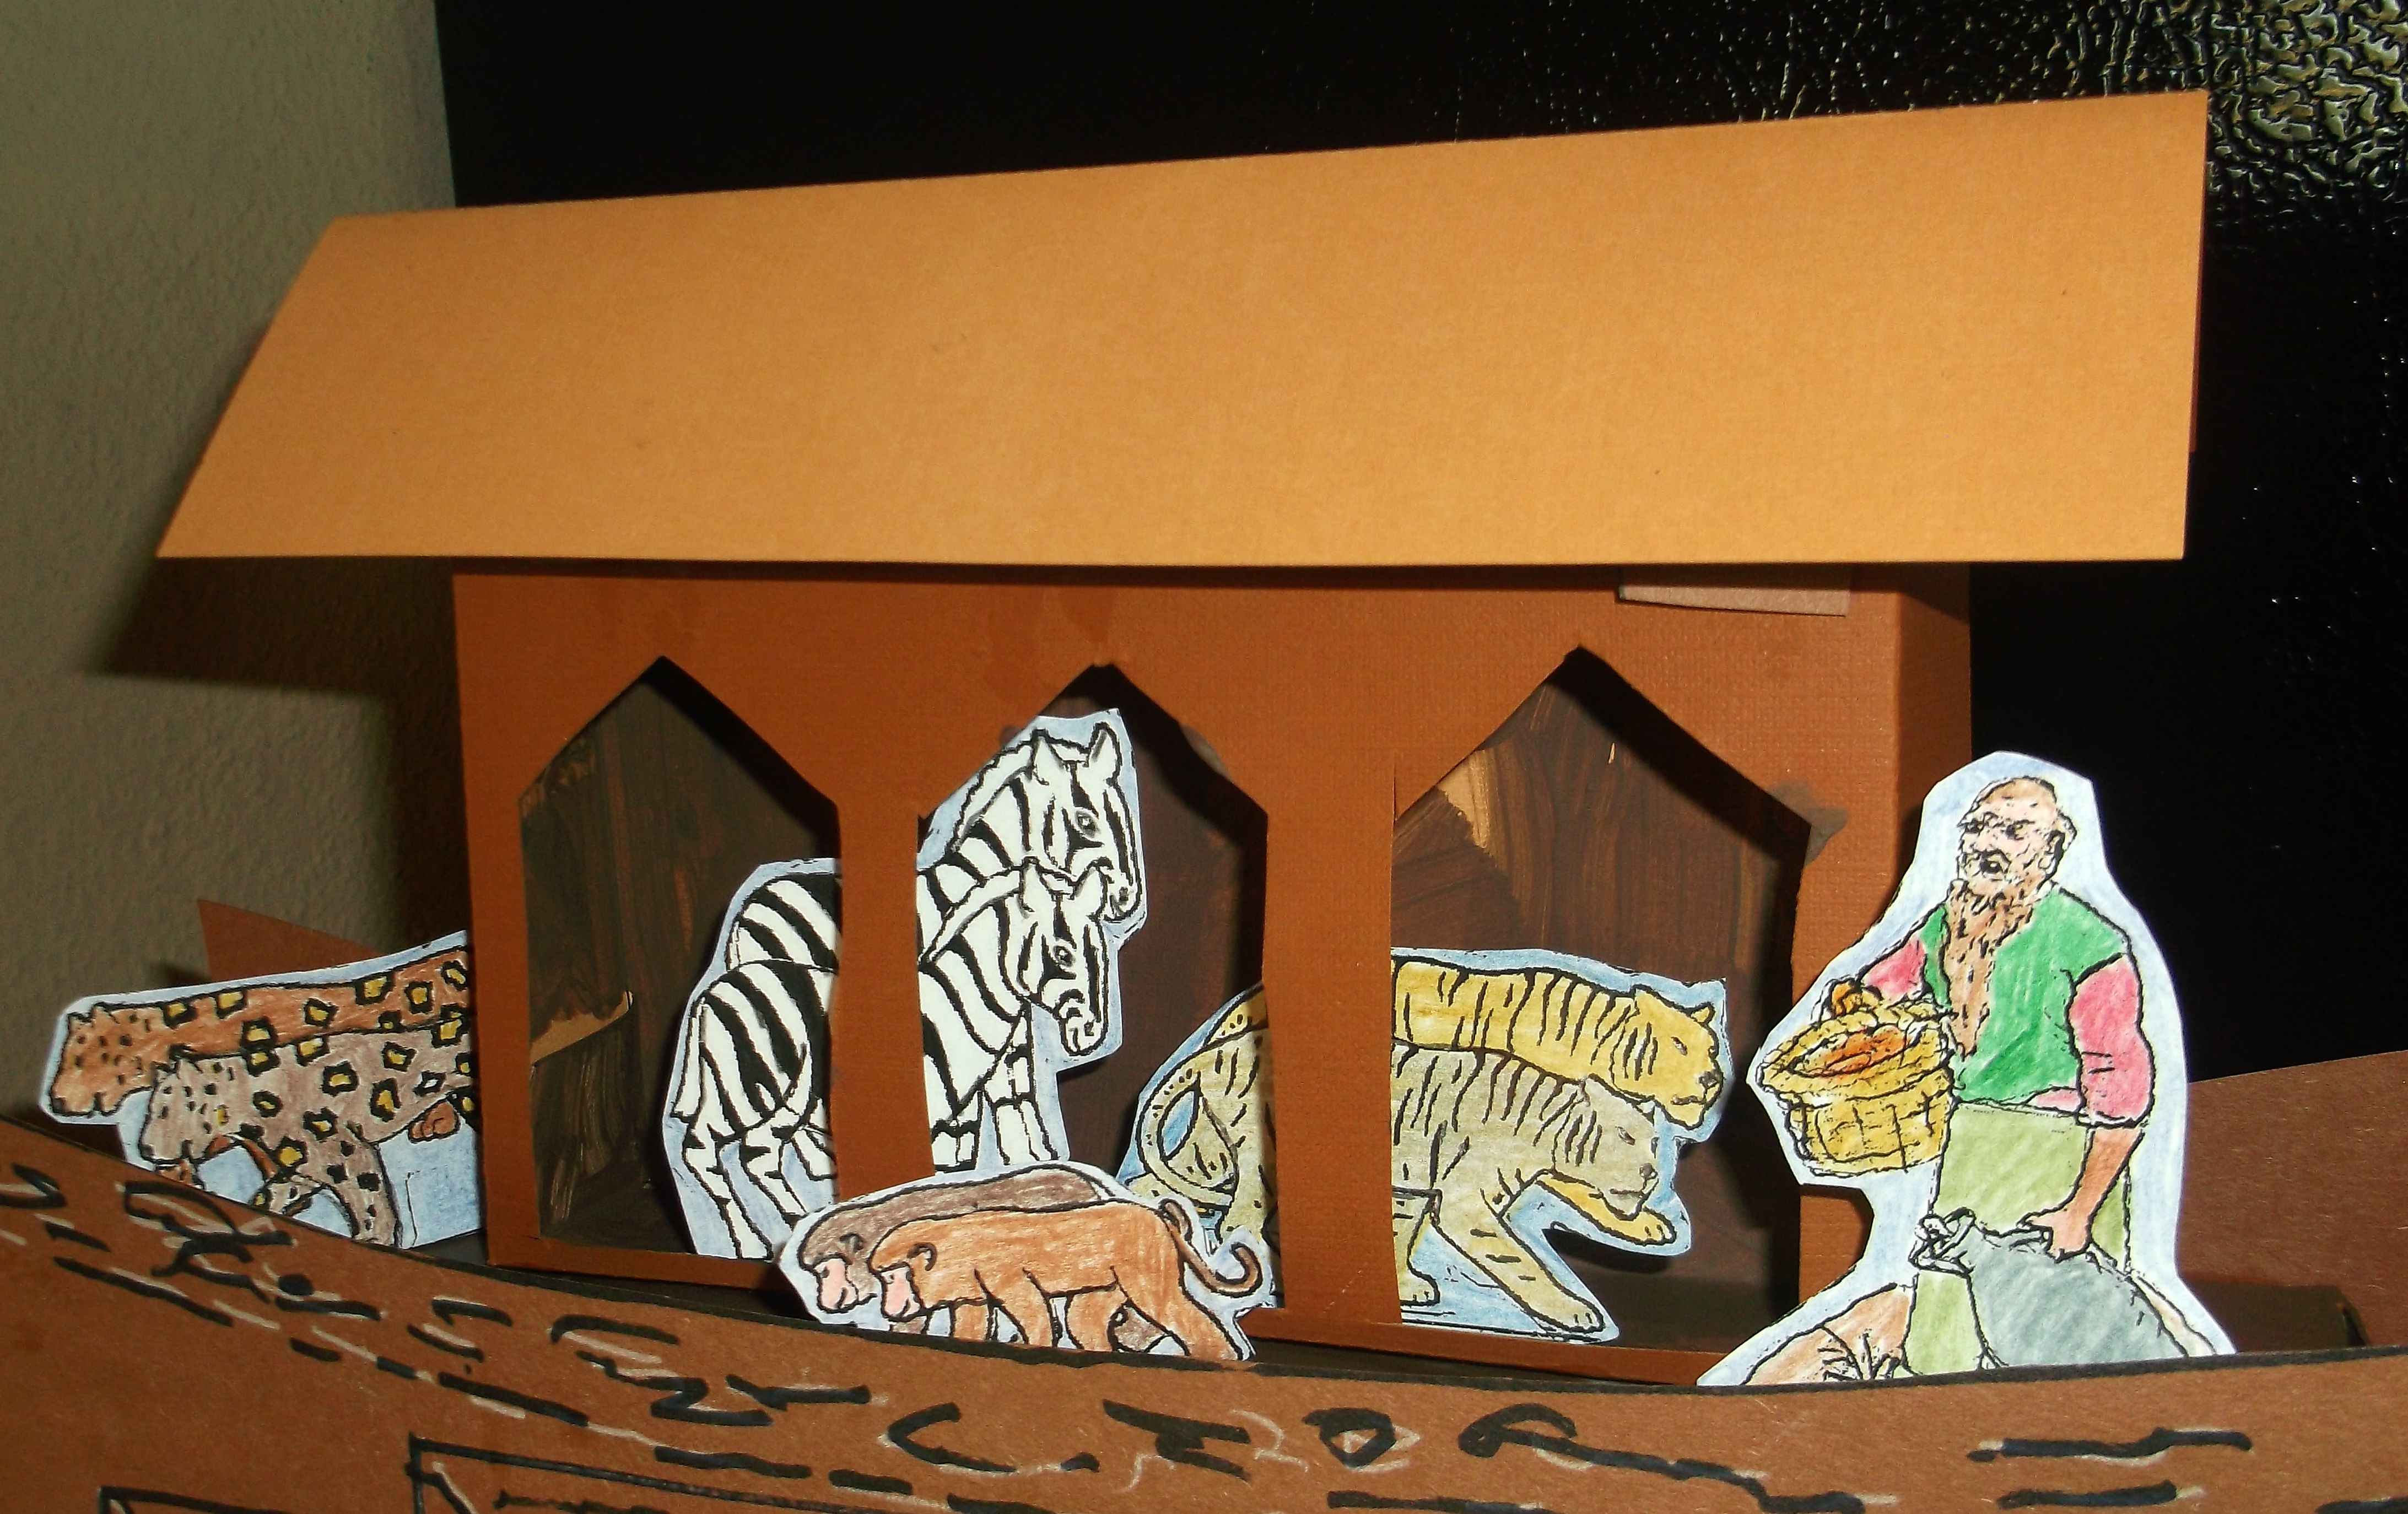 7. Print and copy the Second Story onto brown or tan construction paper. Stylus fold lines and use the craft knife to cut out the arched windows. Fold and glue the second story box shape. Cut a 4″X 8″ piece of construction paper and fold it in half, the long way, to form the roof. Run a line of glue to the top, long edges of the story box and center and set the roof onto the box. Center and glue the top story to the Cheerios box ark.
8. Print out the Ark Covering Patten pieces. Tape together, matching solid or dotted lines. Use this pattern to copy onto brown construction paper.


Cut around outside edge and use the craft knife to cut the top and sides of door flap. The flap opens down. Fold on the fold lines. Apply glue to the area between the folds and set the ark box onto the glue. Glue the side strips to the sides of the ark. Glue the 1/4″ strip below the door, on the Cheerios box, and adhere the hinge area of the door to it. This gives the door a ramp look.
9. If you want the windows to open on the ark, lay the front ark covering over the ark and draw lines inside the windows onto the box. Use the craft knife the cut the windows into the ark. Then glue the ark covering to the front of the ark box. Glue the back covering to the ark.
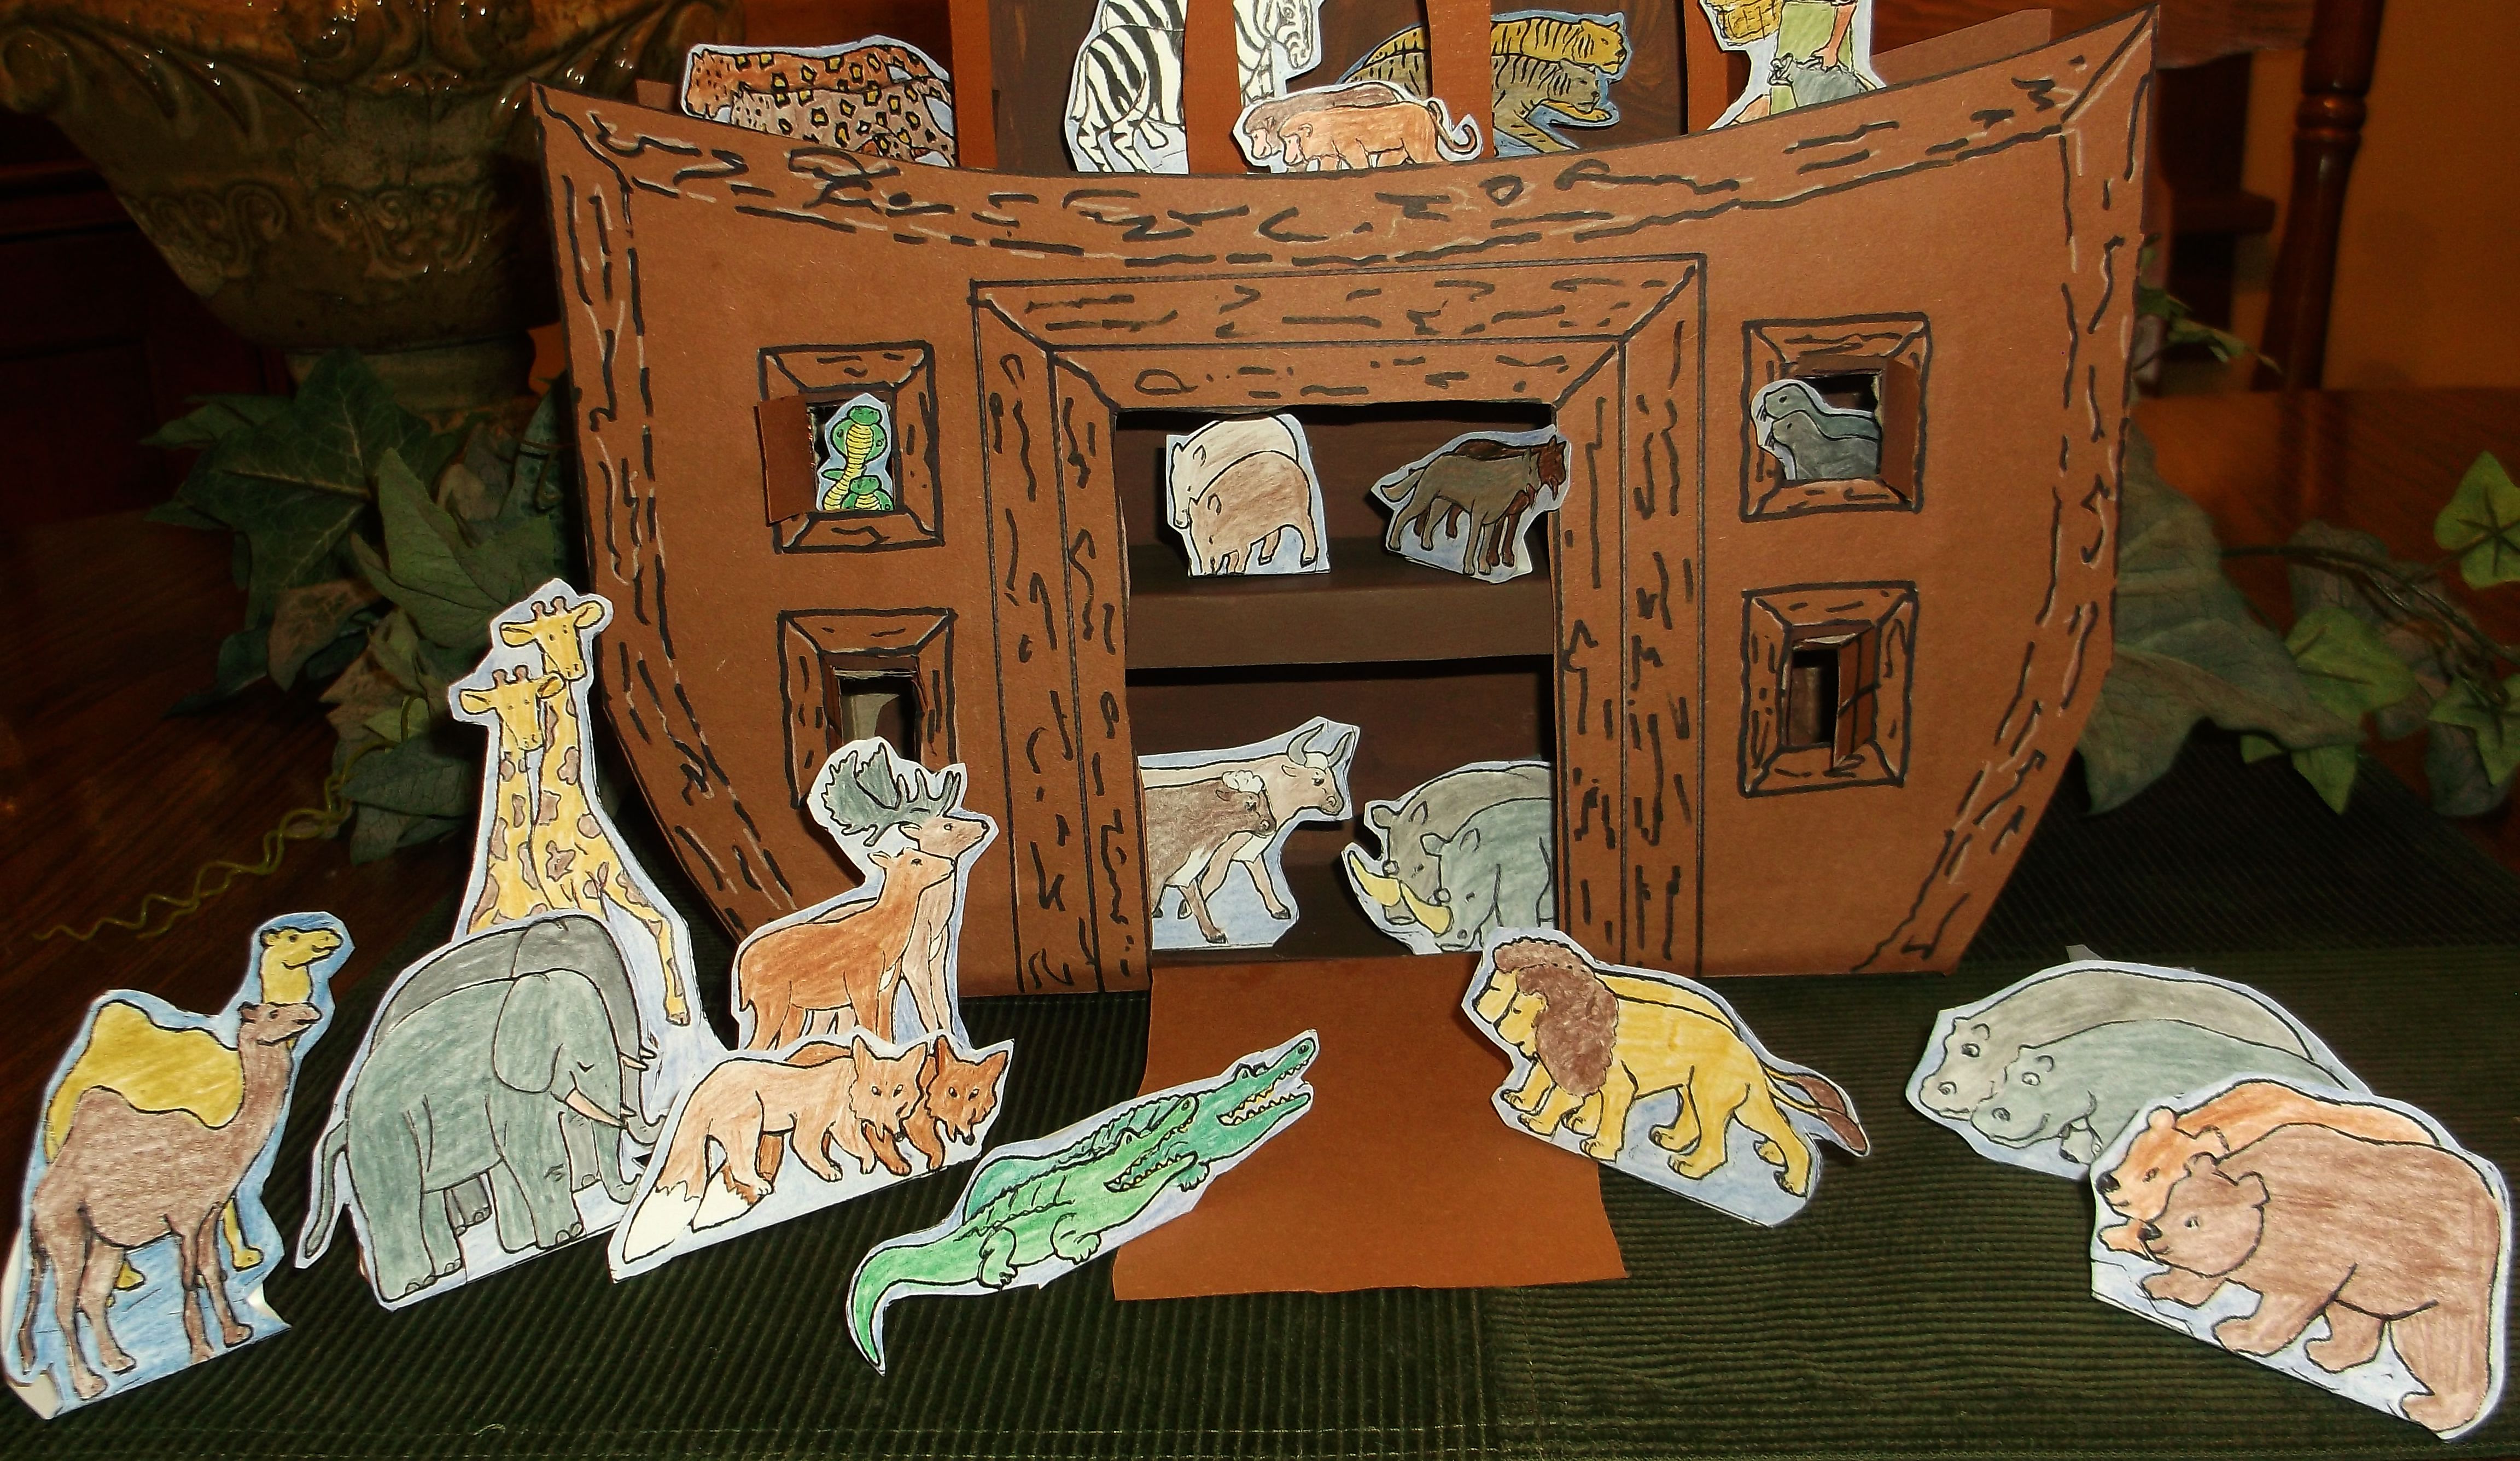 10. Print out the animals on card stock. Color and cut around the animals. Fold the stands and use a dot of glue, or tape, to the back of the animal. Be sure that the animal will stand before gluing tight.
11. Now the fun part, arrange the animals in and around your ark. Noah would be proud of you.
